Tyndall Figures, Melt Figures and Vapor Figures

A complex melt figure branching from a linear feature (pore?, screw dislocation?). The figure is a few mm wide
Summary: Internal melting of lake ice is a complex process that is driven by sunlight and subsequent refreezing when the ice cools off. It results in a wide range of features that can be seen with a hand lens or, better yet, a camera with a close focus macro capability. Melting by sunlight creates melt figures. They are hard to see without careful illumination. When melt figures refreeze, vapor figures may form. They are easy to see in any large grain (S1) ice that has been exposed to a combination of strong enough sunlight and warm temperatures and then cooled under the right circumstances. The story of the discovery and nature of these figures is a fascinating example of how science figures things out.
Detail: When ice is warmed by the sun there can be internal melting from absorption of some of the sunlight as it passes through the ice. If the sun is strong enough and the ice is warm enough, internal melting can take place. Melting starts at grain boundaries as some of the soluble salts that are excluded from the ice crystals as the ice forms ends up in the boundaries. Internal melting can also occur inside the crystals.
When ice melts internally the process needs to be nucleated however there are plenty of small particles in the lake ice to provide nucleation sites. I do not have information on the amount of superheating that is required to initiate melting. Once it starts it forms what can thought of a negative crystal. Sometimes they look sort of like snow flakes (see picture below) but often they more irregular than that (see the picture above). They are called Melt Figures or Tyndall Figures for the first person to study them in detail glacier ice.
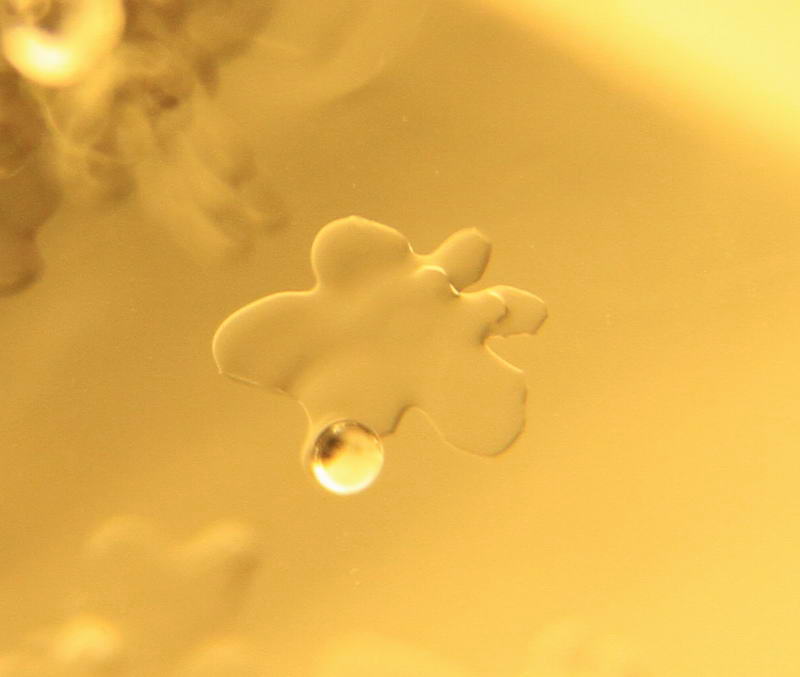
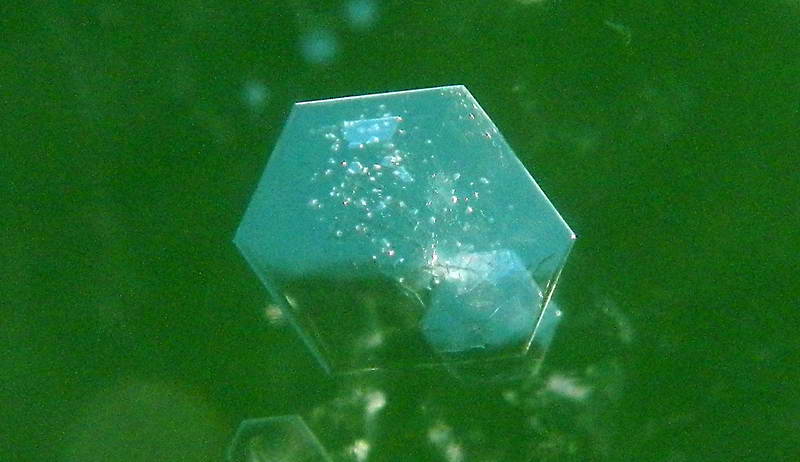
A reasonably symmetrical melt figure with a vacuum bubble. The figure is about 3.5 mm (1/8") across. Melt figures become more contorted by freeze thaw cycles.
When internal melting occurs the melt water occupies 92% of the melted volume so a vacuum bubble forms to fill the excess volume. It contains water vapor at a pressure about 4 mm Hg. These bubbles are easy to see with some magnification because of the large difference in refractive index between a the vacuum bubble and water or ice. The rest of the melt figure is difficult to see as the refractive indices of ice and water are very close to each other. Taking pictures with a dark background and illumination from below with a light table works reasonably well.
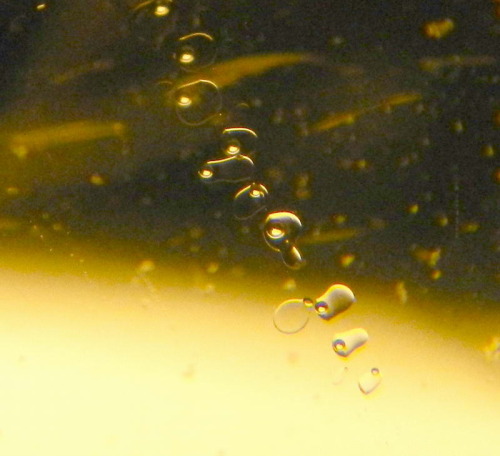 A line of melt figures. They are roughly 0.5 mm in size (0.020").
Ice that has had a lot of exposure to sunlight can have a great many internal melt figures. They may affect the strength of the ice within the crystal but no where near as much as the grain boundary melting. I broke several test bars sawed from warm S1 ice. The average strength in bars with a grain boundary near the center of the beam broke at about 95 psi. A test bar cut from a single large crystal broke at 290 psi (3 times stronger). Typical cold ice has a flexural strength around 150-200 psi.
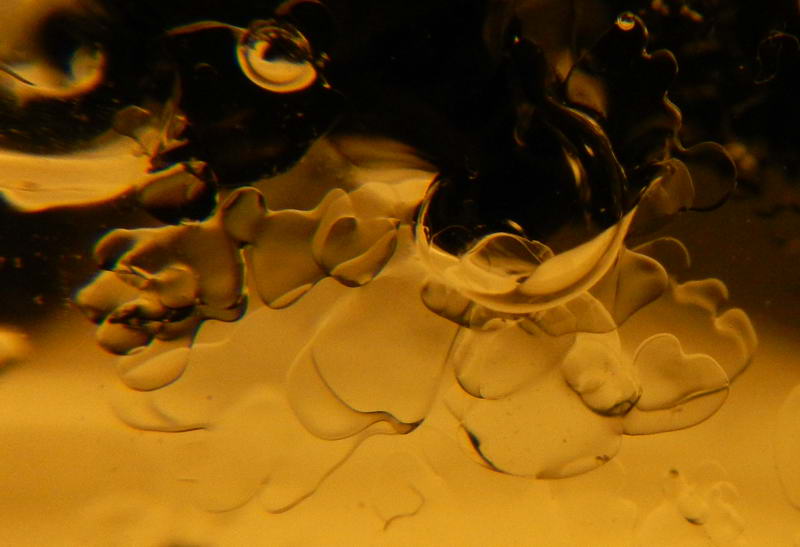 Melt figure near a grain boundary. These melt figures do not have vacuum bubbles as they are connected to the melt in the boundary. The melt (aka water) flows into the melt figures to fill the vacuum bubbles. This accounts for why the grain boundaries are dark in S1 ice and why S2 ice does not show vapor figures. More on this below.
When the ice cools to below freezing the melt figures refreeze. When there is a low temperature gradient in the ice, this results the in the vapor bubble being used to accommodate the higher volume of the refrozen water. If there is a sufficient temperature gradient the vapor bubble may get separated from the remaining water during the freezing process. Once this happens the separated bubble becomes a vapor figure.
Vapor Figures
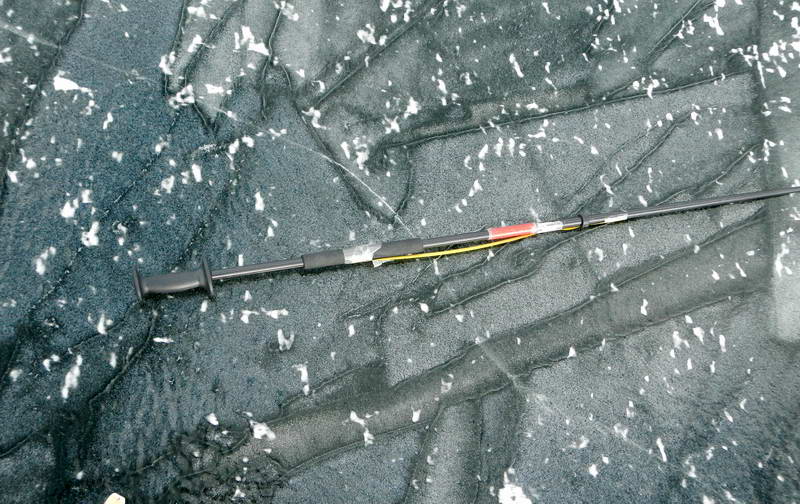
The small speckles are Vapor figures in S1 (large grain) ice (the little white patches are bits of snow)
When the melt figures refreeze they sometimes leave behind vapor figures that are very easy to see because the refractive index of ice is much greater than the near vacuum inside the vapor figures.
Vapor figures can often be seen on S1 (large grain size) ice that has seen a day or two of sunny, weather. They are very thin hexagonal shapes with widths ranging from 0.3-0.4" at the large end to roughly 1% of that for the smaller vapor figures.
They become more pronounced as the sun gets stronger as the season progresses. Typically you will notice a speckled appearance outlined with dark lines at the grain boundary.
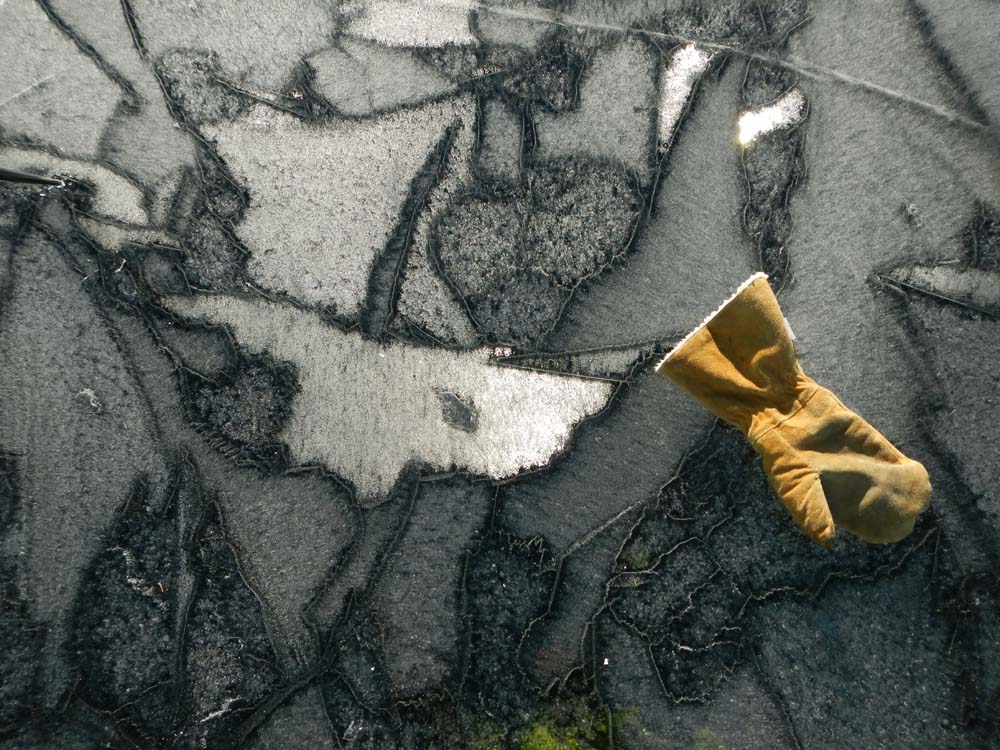
At a certain angle all the vapor figures in one crystal will flash brightly (as shown in the above picture). They only form in the plane perpendicular to the C axis of the crystal so they all reflect sunlight toward your eye at the same time. This ice has particularly large numbers of vapor figures.
The vapor figures reflect light strongly. This reflection is a likely reason why S1 (large crystal size) ice looses significntly less strength than S2 (small crystal size) ice at the same degree of thaw.
 This is a close up of the boundary between two crystals of S1 ice. The line of bubbles is the contact between adjoining crystals. This picture is about 2" from top to bottom.
The dark band along each side of the boundary appears to be a result of melt figures branching off the boundary into the crystal. They form paths of melt figures that fill the vacuum bubbles up to about half an inch from the crystal boundary. Once filled the melt figures freeze without forming vaccum figures. The higher specific volume (lower density) of the ice in the refrozen melt figures stress the ice from the expansion when they freeze. This stress results in irregular melt figures in future internal thawing cycles.
Crystals below a about 1" in size do not develop vapor figures because of the connection with boundary melt water. This is why S2 ice is typically very dark in the same ice sheet where the S1 ice has turned grey from lots of vapor figures.
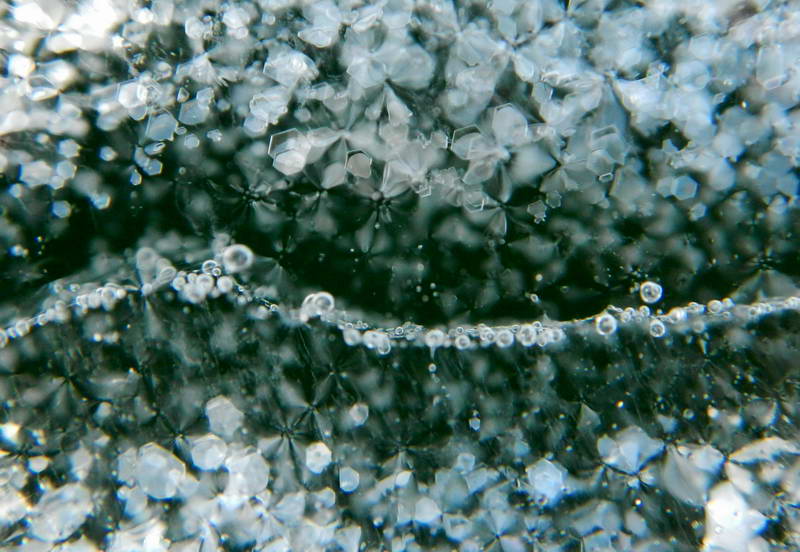
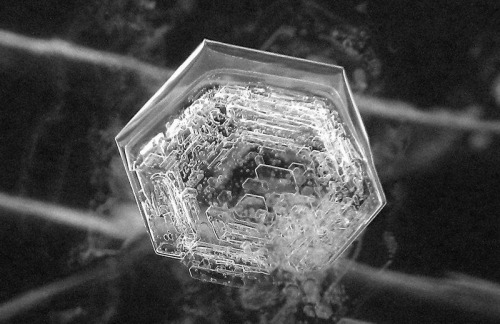
 This is an even closer view of the vapor figures from the previous picture. The view is just above the edge of the dark boundary. Many of them are out of focus or hidden behind other vapor figures but you can see a fair number of hexagons. As you can see they have sharp 120 degree corners and straight sides. The hexagons are roughly 0.1" in across. Well developed hexagonal vapor figures have a thickness that is 1-2% of the width. Note that all the hexagon edges are rotated the same amount (because they are all in one crystal). The three 'A' axes of the crystal pass through the points on the hexagons at a 60 degree angle to each adjoining hexagon edge (in an equilateral hexagon the axes pass through opposite corners).
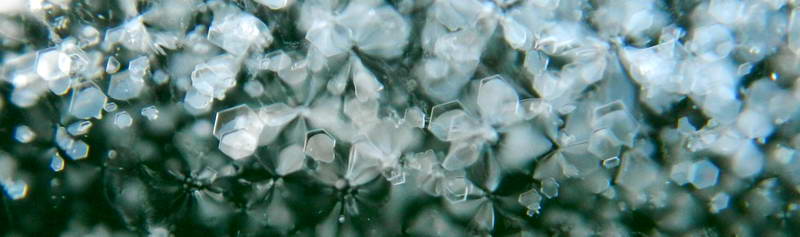
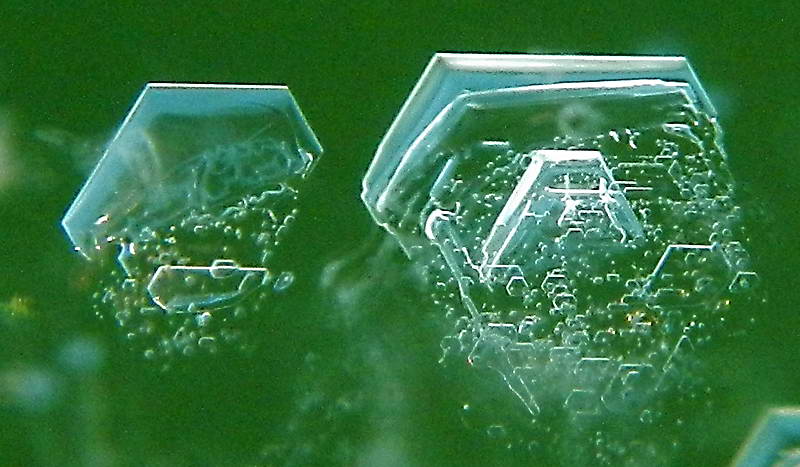
In consistently cold (always below 25 deg) conditions larger vapor figures may develop. These figures are spectacular when photographed (note 1) or viewed with a hand lens(note 2). The following pictures show vapor figures with dimensions from about 0.25" to 0.4". The ice has a different look to it so if you are paying attention it is easy to spot. I only found this a couple times this year (2014) so it is not common
 The basic hexagon has formed and the many smaller vapor figures are just starting to form.
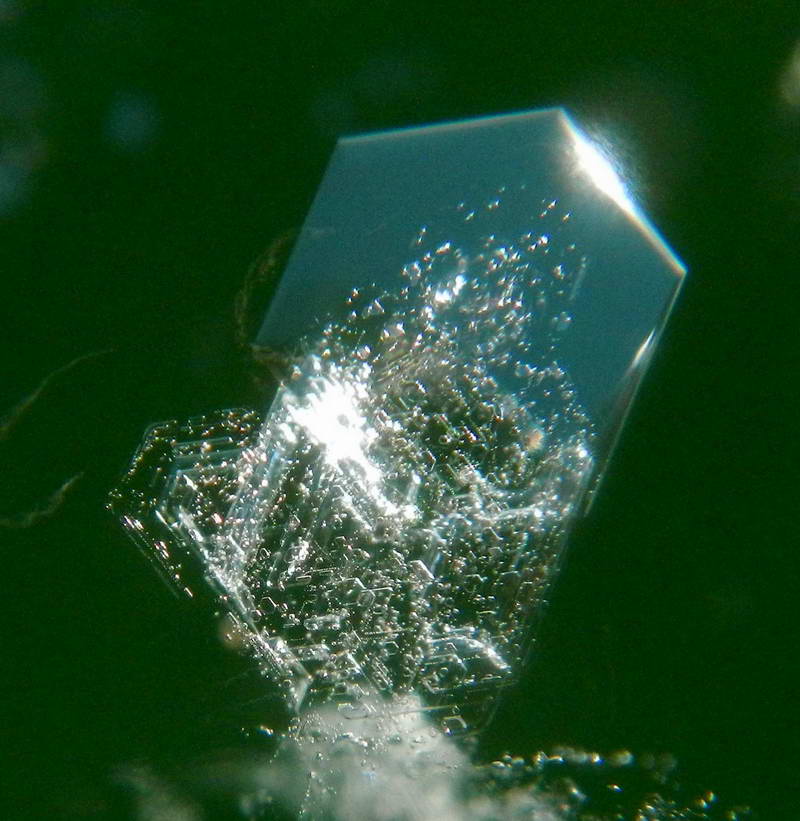
 A flock of smaller vapor figures over underlying vapor figures.
The smaller figures form as the temperature gradient in the ice causes the figures to migrate toward colder ice.
History, notes and references:
John Tyndall was an Irish scientist who did work in a wide range of subjects including glaciology. in 1858 he first observed small (few mm) six pedal, flower like structures inside large single crystals of glacier ice that had been exposed to sunlight. These melt figures were named 'Tyndall Figures'.
Vapor figures were observed by J C McConnel and written up in an article in Nature magazine in 1889.
In 1956 Ukichiro Nakaya published a definitive report: PROPERTIES OF SINGLE CRYSTALS OF ICE, REVEALED BY INTERNAL MELTING. Most of what is described here is from this paper. If you want to know more about these fascinating ice features, this is the paper to read. The file attached to the link is 134 mb so expect it to take a while to download.
THE Amateur Scientist column in the July 1986 issue of Scientific American is about Tyndall Figures and gives suggestions for creating them and observing them.
Note1: All these pictures were taken with a Nikon AW100 camera. It has a very good macro capability in addition to being waterproof, tough and a decent all round point and shoot. I recently acquired a black Olympus TG 4 which has a digital microscope function and a focus stacking function. This is the best pocket camera yet for photographing little things. For backyard photography of melt figures an SLR with a 100 or so mm lens and a 20 mm extension tube allows you to take pictures at F22 for a bit more depth of field.
Note 2: A hand lens is a great tool for seeing little things in detail. If you are reading this article and you don't have one, you need to get one! 7X is best for ice.
