Ice Claws
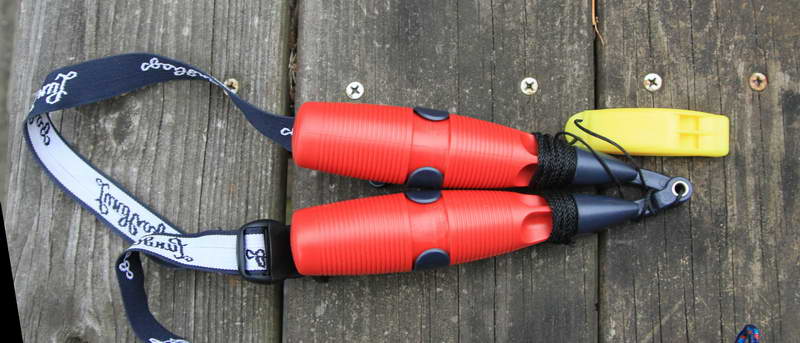 Lundhags: Well designed Swedish Ice Claws with yellow whistle. The Swedish claws are the easiest to find when you are up to your chin in the water and they are the easiest and fastest to deploy. See below for where to buy them.
Summary: Ice claws are the most basic ice safety eqiupment. They are used for getting back on the ice after falling through. The Swedish design shown above is the best type for skating and many other activities. Other types are OK and may have advantages over the Swedish claws in some situations. The following reviews a wide range of claw designs and how to use them effectively.
Detail:
ICE CLAWS ARE SIMPLE AND EFFECTIVE ICE SAFETY EQUIPMENT.
NEVER LEAVE SHORE WITHOUT THEM. Over half of ‘through the ice’ deaths would probably be avoided if everyone had ice claws.
They are also called ice picks, safety claws, ice awls, bear claws, ice gripers, etc. Most local stores that sell ice fishing gear have them. There are a few online sources (see below). There are several different styles.
The Swedish claws are the best design although any style is better than being in the water with nothing.
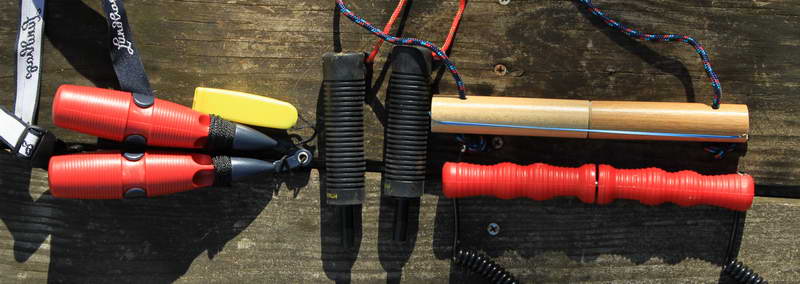 Various ice claw designs
The neck strap on Swedish claws should be adjusted so that the claws can't come over your head when you fall in. If you have a helmit on they can be worn considerably looser.
Home Made Claws:
They are easy to make. The simplest design is the 'broom handle' design. 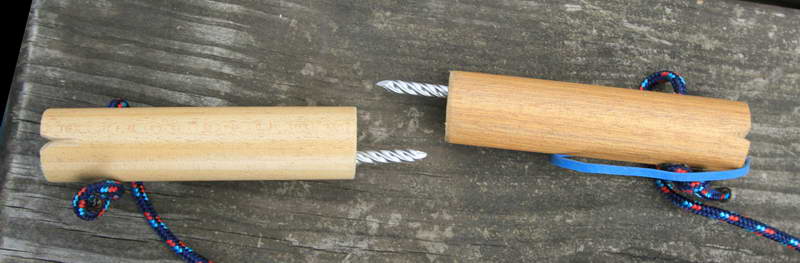 4" broom handle design with spiral 16D stainless steel deck nails and thin rubber band closure. A little sticky back velcro is a better solution if the broom handles are painted or varnished. The claws should come apart reasonably easily (adjust by slightly bending the nails).
I recommend 20D common nails. They are plenty strong enough (roughly twice as strong as some of the commercial claw designs designs which work fine). I suggest common nails and not box nails. The heads can easily be cut off with a hacksaw or bolt cutter. You do not need galvanized, stainless nails or cement nails. It is best if nails are cut as long as you can drill. The point does not need to be any sharper than than the nails in the box. Some of the commercial claw are sharp enough to dangerious
Directions for making classic 'L shaped' claws can be found on the IDNIYRA website. This method is intended for making a bunch at one time and involves a radial arm saw. A few pair can be made efficiently with basic hand tools (hand drill, hand saw and a coping saw or saber saw). There are other simple home made designs on the www.  Classic L shaped claws with velcro closure
Other Approaches:
Some homemade claws are made with cut off screwdrivers. If you go that route, the spike on the end should only be an 1" to 1.5" long to make them more effective and to reduce the impalement risk when carrying them. If the spikes are much longer you get less purchase on the ice than you would with a shorter spike length.
Some ice fishing stores sell 'Ice armband Grippers' with carbide studs. They are worn over your forearms. I have not tried them but I expect they will work pretty well and they are always in place and ready to use (other than maybe having to spin them around to get the studs pointed toward the ice).
I recently met a fisherman who, over the years, has fallen through about four times, usually while riding a four wheeler. He has gotten back on the ice more than once using a jack knife with a short blade he carries in a breast pocket. He admits that real ice picks would work better but he was very happy to have the jack knife when he needed it.
Anything that is sharp may help. Sailors have used their track spikes. If you have creepers on you can use your shoes. Some people just carry a couple of fairly big nails. Skating poles work reasonably well as ice claws. Getting out without claws is doable but technique is important (click here for info on clawless self rescue).
You should have several spare pairs of claws so you always have them with you and you have some for friends. Make a bunch and give them away. Sooner or later you will save someone’s life, most likely your own. (I sailed my iceboat into a loose plate pressure ridge the day I made my first pair of claws...much more luck than sense).
Commercial Claws:
The Swedish claws are designed to be worn close around your neck so they are where you can find them quickly when you are in the water. It is recommended that you keep the neck strap short to reduce the risk that they could come over your head when you fall in. The Swedes have a large skating population and they analyse accident details. They use this to develop well designed safety equipment. The ease of deployment of the Swedish claws also means they can be bumped out of their holder once in a while. For people on foot or skates that seems to me to be a minor liability for what is a very good design. For sailors managing a mainsheet, this could be a problem so another design may be better.
There are two commercial designs available in local fishing stores and on the web. One type has retractable claw covers that are designed to be worn with the lanyard through your coat sleeves and the claws hanging out the ends of the sleeves a little bit. That makes them easily available in the water. They sink in water. If you carry them in a pocket the lanyard should be tied off to you. Some of this type can be found with a spiral plastic lanyard.
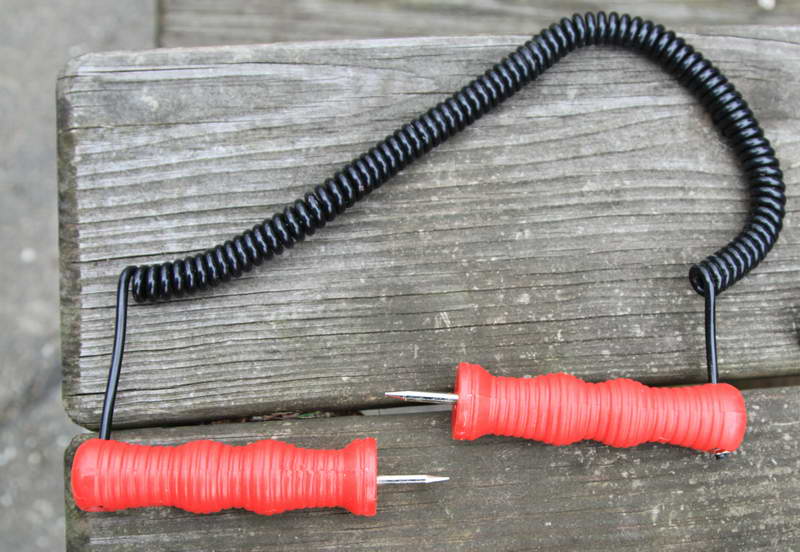
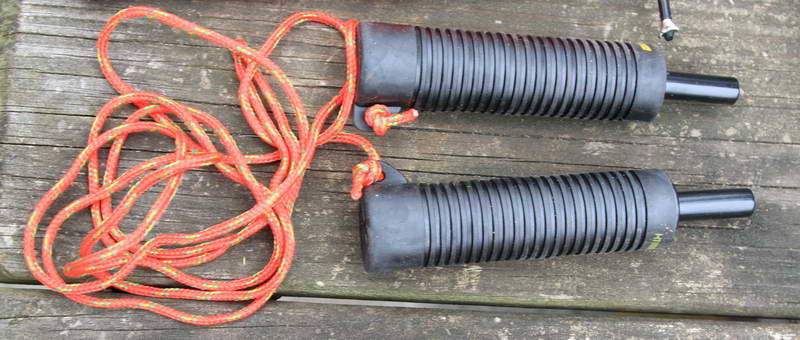 Spring loaded retractable guards over the spikes. This type can also be found with a spiral lanyard similar to the one shown with the red claws.
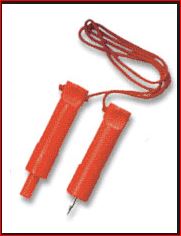
The red claws in the next picture are are available with either a light rope lanyard or a spiral plastic lanyard. I like the spiral lanyard better because it keeps the claws where they are easy to find. As long as they don't slip over your head when you fall in this is not likely to be a problem. They are made with polypropylene but the lanyard is PVC so they sink. THIS TYPE OF CLAW CAN EASILY COME OFF WHEN YOU FALL IN IF YOU WEAR THEM AROUND YOUR NECK. Better to wear them over one shoulder and under the opposite arm.
Angel-Guard Products makes a well made, floating version of the retractable claw guard system they call the Pick-of Life. They have a reflective, thin, rope lanyard. They are favored my most rescue groups who typically carry them in breast, sholder or forearm pockets on their rescue suits.
 Pick-of Life
Deployment:
- The Swedish design is the best as they are easy to find and it only takes one hand.
- Rope lanyards on broom handle or L shaped claws are most conveniently worn over your head and under one arm. If the lanyard is kept reasonably short they will ride on the center of your chest where they are easy to find. With a velcro closure they can be deployed with one hand although not as cleanly as the Swedish claws, especially if the lanyard is under your pack or clothes.
- The black retractable design looks good if you don't mind having them hanging out of your sleeves.
- The red plastic claws require pulling apart which can be done with two hands or one hand and an armpit or teeth (not recommended unless you are desperate).
Breast pockets are probably a reasonable place to carry them. Places that are either poor or useless include pockets that are harder to get to, packs, tackle boxes, gear buckets, on your fishing sled or snowmobile, vehicle glove compartments, or at home.
A good procedure for using ice claws is:
- When you see you are going in, put your hand over your mouth and nose to reduce the chance you will gasp in water.
- If you can, try to slow your fall to minimize the chance your head will go under. The general method is to spread your free arm, your other elbow and legs as you go in and pull your legs together as you get to about waist deep and swing your arms down as you approach shoulder depth.
- Once in the water, get your breathing under control (this may take up to a minute).
- Turn to face the direction you came in from (the the strongest and best known ice is probably where you came from).
- Swim back to the edge of the ice.
- Find and deploy your claws. Stab one into the edge of the ice.
- If you have a throw rope you can get at easily, throw it back to anyone you can who is still on good ice. Obviously the end of the rope should be attached to you (typically to a pack which has a waist belt and/or a leg loop.
- If you have poles of any sort, place them across the ice a foot or so from the edge (to support your weight better).
- Get the second claw in.
- Swim you legs up behind you
- Pull with the claws, lift with your elbows to get your body over the edge while kicking with your feet (a frog kick works well). It may take several kicks to get you out.
- Once out, roll away from the edge or drag yourself with the claws until you are sure the ice is strong enough to get up on your hands and knees and proceed until you are confident you can stand on the ice.
- Change into the dry clothes in a waterproof bag that you brought (assistance with changing is a big help). Get to shore or, if you are in a dry suit on, have some lunch and continue to enjoy the rest of your day.
Click here for a video of a self rescue practice event we held in 2010. Click here for the 2012 event.
- Breathing: The gasp reflex can be unavoidable. If you manage to get water in your larynx it can make breathing difficult or impossible for a period of time - hopefully a short one! As best I can tell, the biggest risk is if your mouth is open when you are gasping. That is why our local rescue team suggests putting your hand over your mouth and nose as you enter the water. Part of your plan to save yourself should be to deliberately clamp your mouth closed as soon as you realize you have broken through. There is some difference of opinion by experts about how big a risk the gasp reflex is.
- If you are under the water most people can’t hold their breath in cold water for more than a few seconds. I have been told by a knowledgeable Swede that it is quite rare that someone is trapped under the ice.
- Get on with getting out. Your ability to grip things like ice claws and throw ropes goes away in a few minutes.
- Claw Placement: There is a tendency to place the claws as far back on the ice as you can reach. In most cases, stabbing your claws a foot closer to the edge will let you get more weight over them and your elbows. The purpose of the claws are to let you lift your upper body over the ice edge without sliding back in.
- Swimming your legs to a horizontal position behind you makes getting out much easier.
- Getting to shore and re-warming: If you are not fully re-warmed by the time you get to shore you need to get rewarmed BUT if a car is involved, have someone else drive you. In some cases you may develop a re-warming heart arrhythmia that could cause you to lose consciousness.
- Call 911 at any point in this process if it looks like the victim is significantly hypothermic of shows any other signs of medical distress. If in any doubt, call rescue. They much prefer being called when they are not needed to not being called promptly when they might be need.
If you can't find what you want locally, here are some www sources of ice claws:
Swedish Ice Claws From VT Nordic Skater (menu on the right near the bottom)
Floating, retractable sheath claws (Pick Of Life)
Red Claws with spiral lanyard (Shown above)
Black Claws with retractable sheath and nylon line lanyard (shown above)
Yellow Claws with retractable sheath and spiral lanyard
Bob
