Ice Testing Tools
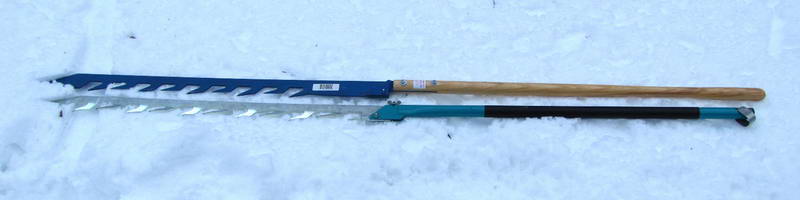
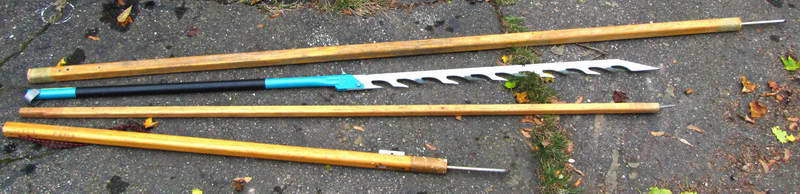 8 foot pole, saw and a couple shorter poles
Summary: There are lots of methods for testing ice the following is a short list of what I think are the best choices:
- Skaters: Nordic Test Poles. They are light and effective for testing and they provide stability on rough ice and extra thrust for skating upwind when the wind is over 10-15 mph.
- Fishermen on foot: A spud (ice chisel) is best but a drill is OK
- Iceboaters: A wooden test pole (like those shown above)
- Snowmobilers and ATVs: A drill is best, hatchets are also used.
- Cars and pickups: a fishing drill
Detail:
Test poles are great for testing cold black ice for sufficient thickness for people on foot. Even the heaviest ones are limited to testing ice thinner than four inches. For vehicles, especially cars and trucks a drill is a better choice.
8 foot ash ice pole: Heavy, strong and long: great for ice checking. This is my favorite ice testing tool when I am walking on dodgy ice (as long as you do not have to carry it too far). It is long enough to be easy to attach to a DN iceboat from the mast step to the plank. The long length lets you reach out several feet (very comforting when you are not confident in the ice). You can hit many areas in a few seconds. It will easily go through 2” and will go through 4 in a couple hits. Shorter and lighter versions of this are also effective.
Ice Fishing Chisel (also known as a spud): An excellent tool for checking ice. It may be a bit heavy to travel with. They can get through a lot more ice than most test poles but in ice over a few inches thick a drill is faster. One shortcoming that has claimed quite a few ice chisels is they sink faster than a stone. The T handle shown below should reduce this problem.
 4-1/2 foot ice chisel made with 1/2" rebar (good grip).
You can make a reasonable test pole with a few feet of half or three quarter inch black iron pipe.
Nordic Skating Poles: Can penetrate 2” of ice with a couple of stabs. They are light and handy for skating. They are especially useful for balance when crossing rough ice and pressure ridges. They are quite strong but they can be bent or broken if abused. Usually this happens when you poke thorough the ice while you are moving and you don't lift the pole out fast enough or don't let go of the pole before it passes an arms length behind you. They are the best tool for serious skaters.
Click here for an excellent Swedish video on use of a test pole with English subtitles
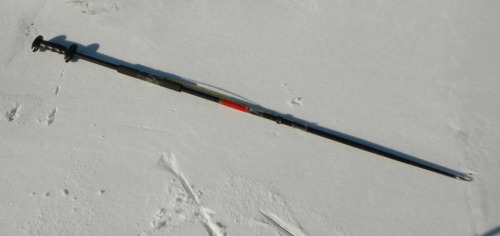 Nordic Test PoleOn cold 2" ice the pole will penetrate the ice about 80% of the time. It will penetrate 2.5 inch ice about 20% of the time and 3" occasionally, especially if you are strong and are nervous about the ice strength. On less than two inches the ice will penetrate every time and do so progressively more easily at lower.
If the pole does not penetrate it is a good idea to poke 3 or more times. When you know the thickness, poke it a bunch to calibrate yourself.
On partially thawed ice the pole penitrates thicker ice more easily. In advanced that conditions S2 (small crustal size) ice the pole can penitrate seven or more inches. This is probably weak ice ice. S1 (large crystal size) ice with the same thaw history is generally stronger and pokes more like cold ice.
The tips of nordic poles are sharp, acute and hard. This lets them penetrate the ice when testing or using them to help propel yourself when poling. Even hard steel dulls quickly when poked into stone (concrete, asphalt, dirt etc) so they should only be used on ice.
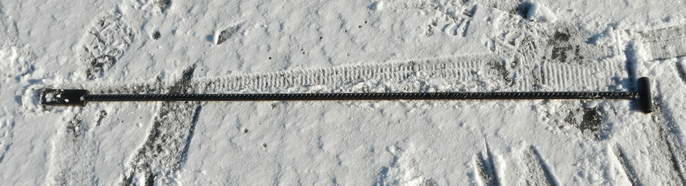
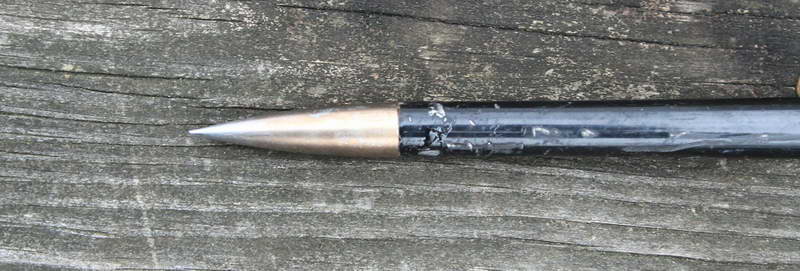 Sharp Pole Tip
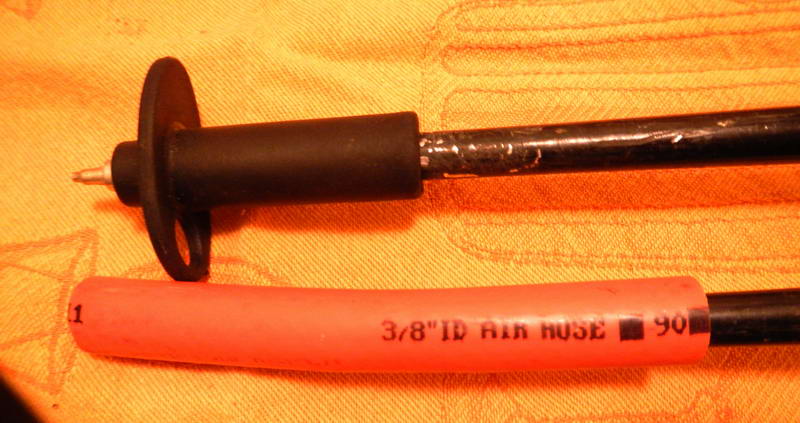 These poles are quite sharp and can be dangerous. The black, studded Swedish protector is great but only available in Europe. A five inch piece of 3/8" id air hose works well (shorter than that may poke out the end). A small machine bolt across the end of the hose will keep the tip from sticking out of the end.
Needless to say you could easily stab yourself or someone else so they should be handled with appropriate care. Be careful to keep the tips low when carrying them or when poling. I have learned more than once that planting one just in front of your skate occurs about 0.3 seconds before you find your self sprawled out on the ice. Knee and elbow pads are a wonderful thing. If you do use the poles to help propel yourself in windy conditions be careful to place the upwind pole well to the side as the wind can push the pole several inches toward your upwind skate, especially if you are skating across the wind.
They are typically carried parallel to each other in both hands and diagonally across the body. The tips are acute and sharp enough that they will dig in if you are not paying attention and let them touch the ice. For that reason never carry them pointed ahead with the handle pointed at your body. There have been some injuries from getting the handle jammed into someone's abdomen.
Armpit length seems like a reasonable compromise between being long enough to push yourself along and short enough to drive through the ice. There is a range of opinions about how long the poles should be. Spend the extra few dollars for the elite poles as they have grips that allow you to deliver more energy to the pole when testing.
In Sweden skating poles are rarely used for anything other than ice testing and traversing very rough ice. It is considered bad form to use them to push yourself along when going up wind.
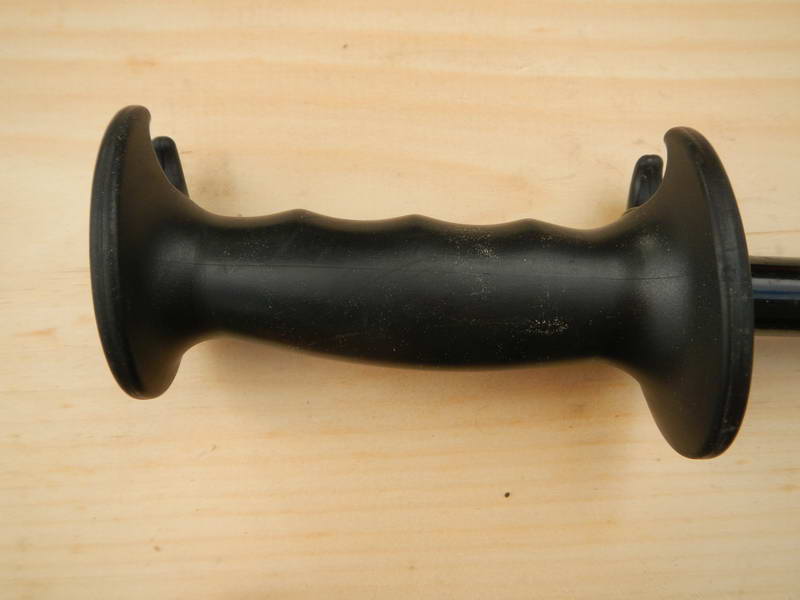
The above is a picture of the handle of the 'elete' skating poles. They cost a few dollars more but the grip flanges allow you to make hard one hand stabs when ice testing.
Note: Collapsible skating poles are available. The one person I know who has them found he could not make the joint tight enough to reliably prevent the pole collapsing during hard testing.
Click here for a source of nordic ice poles (and ice claws and throw bags).
Lighter/shorter home made wooden poles: A balance between weight and effectiveness. They are a good choice for many situations.
Tips for making a home made pole: use hardwood, wrap about 4" of each end with 3+ layers of fiberglass/epoxy. Use grade 8 bolts 3/8" or bigger if the spike will stick out more than three inches. A chisel point works well as does a pointed or flat end. Obviously, be careful about not testing the ice directly under your foot.
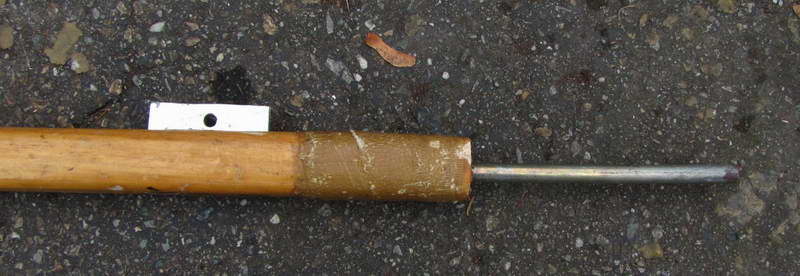
The pole shown above is 1.5x1.5" ash with rounded corners. The surface is painted with epoxy which had sugar sprinkled on the wet epoxy to provide a rough surface for grip. Wrapping the wet epoxy in peel ply will also give you a rough surface and not be as messy as sugar. Friction tape works well to. The 1/4" thick aluminum piece is epoxied into a full width slot. Once you have driven thought 2-3" ice with the spike you can usually drive the ash handle through to. It can be rotated 90 degrees and pulled up to measure the ice thickness (the pole has inchmarks on the other side). This only works on ice less than about 3". The bolt is a 1/2" by 10" grade 8 bolt with the head cut off. It is epoxied about 3" into the ash. The end of the bolt was left flat to reduce the impalement risk a little. It will go through up to 4" of black ice in a couple hard hits.
A suggestion on using wooden test poles: If you are on ice you don't trust you will use your pole a LOT. Let the speed and mass of the pole deliver energy to the ice. If you try to drive the pole with your arms you put a lot of strain on your forearms from overgripping the pole ('white knuckle grip'), especially if the pole does not have a high friction surface.
Bob Stone Ice Tester:
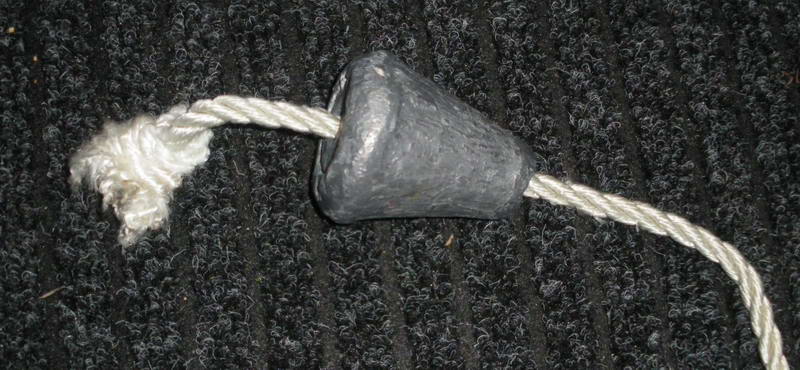 The Bob Stone Ice Tester (BSIT): 5 lb lead cone on a 3/8" nylon rope. From André Baby (Montreal DN sailor): "We have been using two very useful and easy to use tools . One is the conic shaped 5 pound lead weight, thru which a center hole is drilled and a 25 foot nylon line is attached. A couple of figure 8 knots are made at one end to secure the weight. The big advantage is that it can be heaved up in the air a good distance away from the ice checker. When it hits the ice with one of its edges, it is exerting pressure of hundreds of pounds per square inch. If it bounces, the ice is minimum 3 inches thick. We can cover quite a lot of territory quickly without having to drill or chop though the ice . If the weight goes in even partially, or draws water it means the ice is less than 2 inches, which we consider unsafe. When not in use we drag the weight along the ice. The other tool we use in conjunction with the lead weight is the crowbar. It's easier to pierce ice with the crowbar than with an axe and I find it easier and less dangerous to carry."
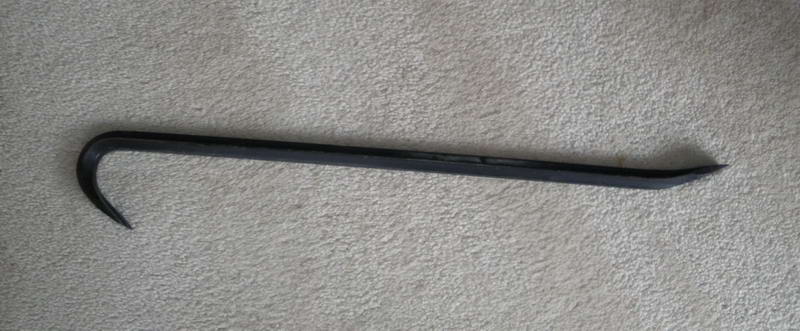 Crow Bar.
Editorial Comment: They have been using these tools for many years in Montreal. I have experimented with the BSIT and it works as described. When it broke completely through, a hard tug on the line would pop it back onto the surface. You need to pay some attention to not dropping it on your toes. It is heavy enough that it is probably best used for ice checking with an iceboat. If you use it as rescue rope, don't toss the heavy end of the rope to the victim. It will not improve his ability to swim.
Ice Drills: Drilling holes is a more accurate way to measure thickness and the best and fastest way for measuring thick ice. A drill is not as fast as a pole to assess ice up to 4". There are several brands of fishing drills. 4” is the smallest size and the easiest to drill deep holes with.
 Folded Nils saw and modified 5" drill (note black inch marks for measuring thickness)
Rechargable Drill with a Wood Auger Bit:
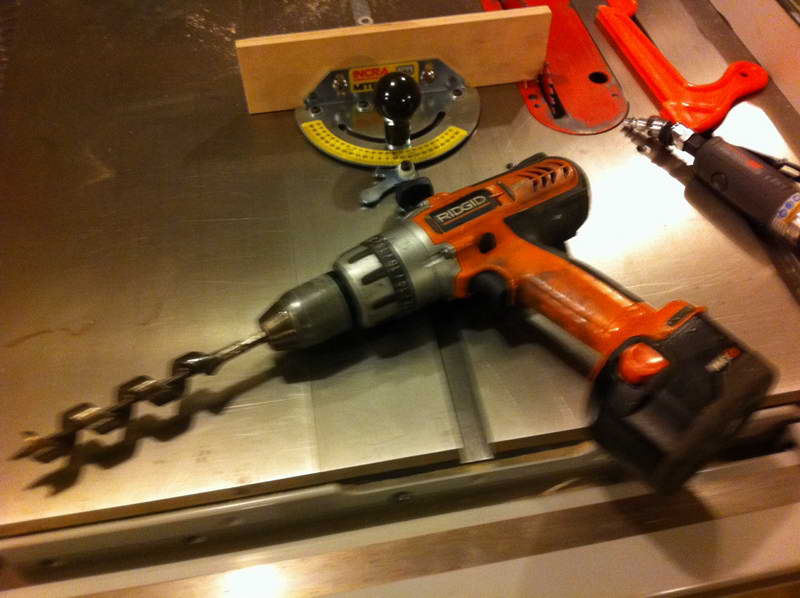 John's rechargable drill with 6-1/2" sticking out of the chuck.
John Bushey, a Minnesota Nite and DN sailor and snowmobile rider, uses a rechargeable drill with a 5/8" or 3/4" wood auger bit with a 6" mark on it to show if ice is thick enough for his sled. It is quick, compact and easy to use. John reports he can drill 50 3/8x2.5" holes in his sugar maples in 25-35 degree weather on one charge with his 12 volt Rigid drill (with a reasonably new NiCd). A battery charge lasts less in the cold. On cold days, it might be worth keeping the battery in an inside pocket when not needed.
Ice Screws:
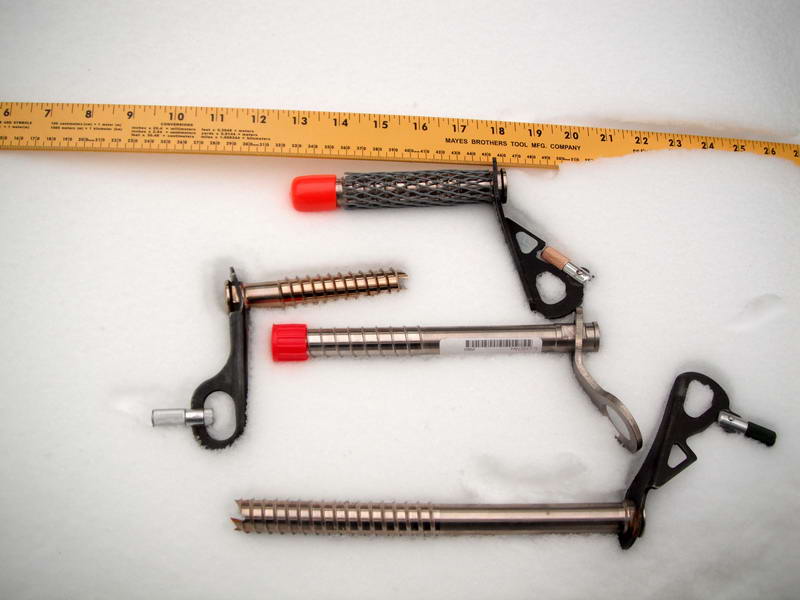 From the top: 90 mm Black Diamond, 90 mm Omega Pacific, 130 mm Irbis titanium, 220 mm Black Diamond.
Ted Mckibben wrote to say: "A tool that you might add to your site is an ice screw. It can be used for checking the thickness of the ice up to about 6" depending upon the length of the screw, and for a belaying point for rescue. They are sharp, easy to use, and fast to operate."
The pitch on most modern screws is 1/4" so you can count the turns and divide by four to get the thickness. Generally they spall off the last 1/4" or so when they break through. Remember to promptly remove the crushed ice in the core. With a good design a couple bops on the ice is usually enough. A little spray lubricant on the inside helps as well. Screws with crank handles (Omega Pacific and Black Diamond above) are easier and faster to wind in.
I tested all the screws in the above picture along with a couple others. They are all unused and as sharp as they will ever be. The Omega Pacific screw really stood out. It started and wound in significantly more easily. It also put considerably less pressure on the ice. I did my testing on a piece of ice I brought home. All the screws but the Omega Pacific split the plate most of the time.
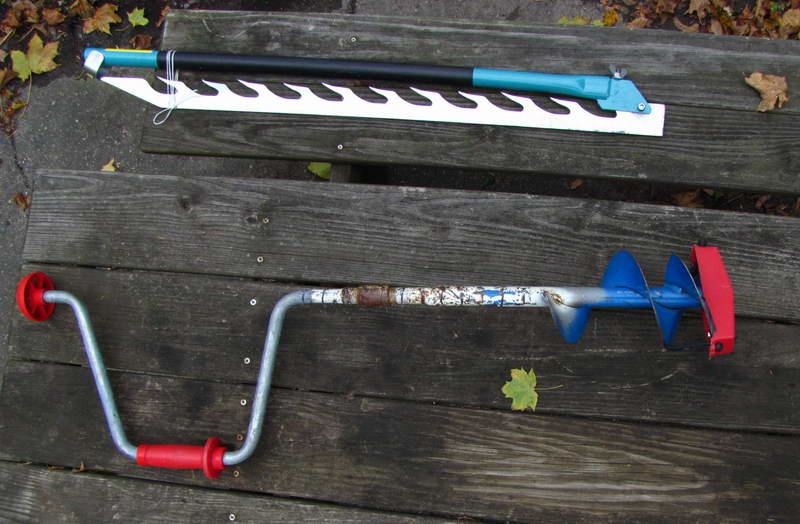
Ice Saws:
 Top: Fish's ice saw, Bottom: Nils ice saw. Scale: They are about 7 feet long and they fold to half that length. Not an ideal thickness tester but great for cutting out sections of the ice to inspect an ice sheet. If you have questions about the integrity of an ice sheet this is a great way to good look at the internal structure. They are also good for making plurrövning (swimming) holes without leaving an oil sheen on the water as a chain saw will. A saw can poke through 2-4” of ice with a few hits. Thicker ice may require a starter hole or wet crack. On 7" well thawed small grain ice a saw will cut about 6 feet per minute and keep you warm while you are doing it. They have a lot of tooth set and can cut a round holes as small as about 7". Be mindful of making bigger holes that people might step or fall into (leave something mark them until they refreeze (stick, branches, ice block, etc).
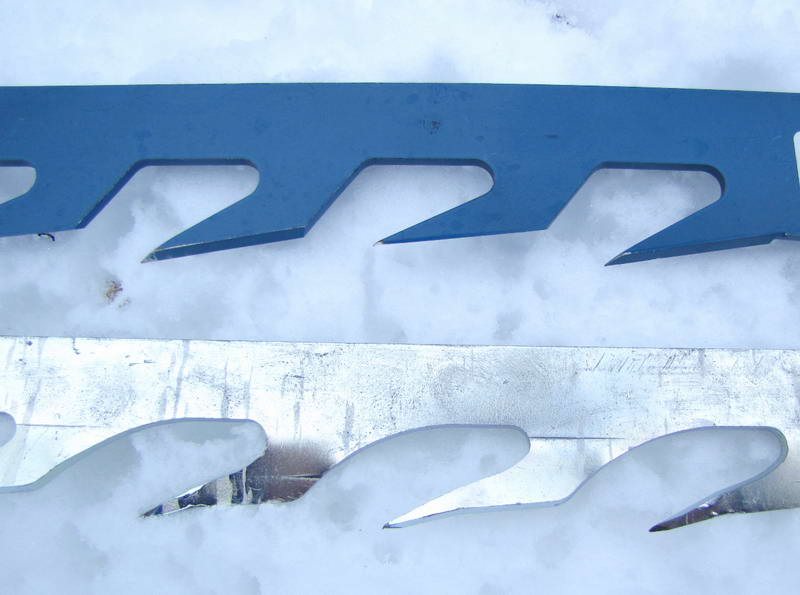 Close up of the teeth on Fish's and Nils saws. I found my Nils saw tended to catch part way through most down strokes. Saw users on fishing forums indicated they found the Fish's saw was smoother. I bought one and it is significantly smoother and the cutting rate is a bit higher. I recently spoke to the importer of the Nils saw and he said if you reduce the set a bit it will cut more smoothly.
Hatchet or Axe:
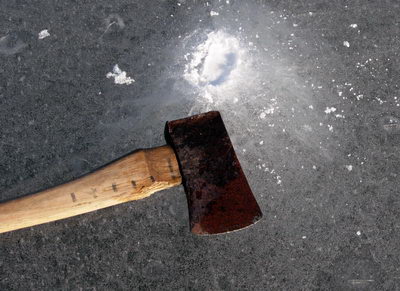 Axe with inch marks. Tool and photo by Richard Saltonstall.
Axes have a following in Maine. Richard's comments about his axe: "I use an axe to test the ice with magic marker lines on it so I can measure the thickness of the ice without an enthusiasts bias and denial. I can also chop out sections of ice for crude core samples. Dull works fine (and is safer to carry). Hatchets are nice tools to. I like the axe because I can skate with it and smash the back of axe head on the ice while I go. Observing what the axe does tells me a lot. Nice sharp radiating cracks are a good sign."
Lloyd Roberts describes it this way: "I use an axe and have very simple criteria; if the back of the axe goes through the ice it is too thin, if the back of the axe bounces it is skateable, if the sharp edge does not draw water it is sailable (in a DN). No matter what you use you will need to 'calibrate' your tool use so you know what it is telling you. Cold black ice behaves considerably differently than warm (partially thawed) ice of any sort."
A hatchet is compact making it more reasonable to carry on snowmobiles and four wheelers. Again, a dull blade is fine for testing ice.
Click here for an article in the New England Ice Yacht Association newsletter by Loyd Roberts on ice checking. Editorial note: Lloyd is very experienced on ice and I suggest that anyone who is less experienced add an inch or more to his minimum thickness numbers.
Ice Axe: a little light but a pretty good tool
Claw Hammer: Not bad but a hatchet is better.
No matter what you use you will need to correlate ice thickness with how the ice responds to your tool. The response changes significantly once the ice starts to thaw.
Less than great test tools
Cross Country Ski Poles: The offset spike on the end makes them ineffective for testing 2” ice. You can peck through a couple inches if you work at it.
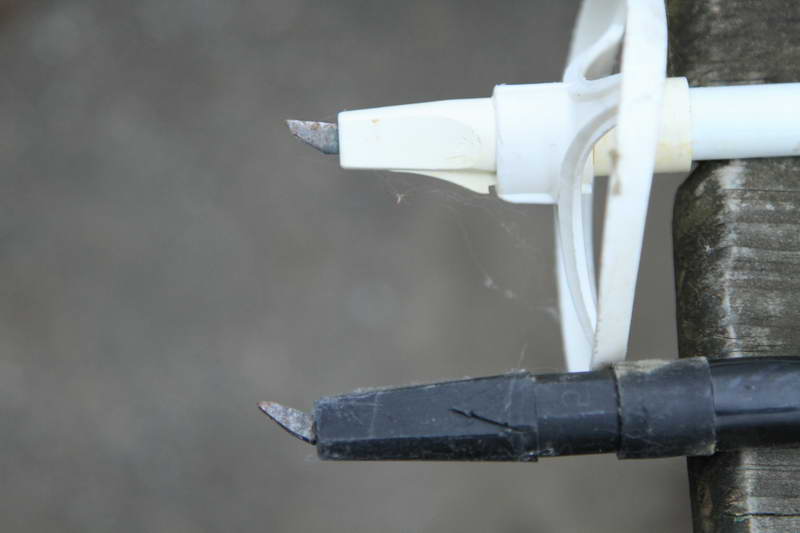 Off-set tips on XC poles. Good for poling but not so good for testing.
Downhill or Hiking Poles: Modern downhill and hiking poles almost all have a blunt tip. They are useless as test poles. Some older style downhill poles to have a pointed tip but the taper is too blunt to penitrate 2" of ice with a single hard stab.
Hockey Stick: commonly carried but not effective for testing 2” ice. Better than nothing for fishing out a wet friend. A throw rope is a much better tool for rescuing someone.
Ice Claws: It takes a lot of pecking to get through two inches. Since you will probably do this from your hands and knees, you also are in a less than great position if you break through.
Shoe or skate heel: If you can put your heel through the ice it is either very thin or well thawed. Assuming you have not fallen through yet, you ought to consider getting on better ice, promptly.
You: If you don’t bring along a test tool (or don’t use the one you have) you become the test tool.
Your Red Super Duty 6.7 L V8 Turbo Diesel Pickup: Variations of this tool are widely used and have been shown to be particularly effective at finding weak ice, especially at pressure ridges and on warm afternoons. Kidding aside, crossing ridges, driving at night and thawed ice account for most of the vehicle related ice fatalities. (see Vehicles and Ice page)
If you have a favorite ice testing tool that we have overlooked or under rated, please get in touch.
